


Introduction
Email marketing is one of the most effective digital marketing techniques for businesses that want to communicate with customers, generate leads, promote products, and build long-term relationships. Whether you run an educational institute, an e-commerce store, a service-based company, or a digital marketing agency, email marketing can help you reach the right audience with relevant information.
However, managing email lists, designing professional emails, sending campaigns, and tracking results manually can become difficult as your business grows. This is where an email marketing and customer relationship management (CRM) platform such as Brevo becomes useful.
Brevo is a platform that provides email marketing, contact management, signup forms, automation, and other customer communication tools. It helps businesses organize their contacts and manage marketing activities from one place.
In this guide, we will explain how to use Brevo step by step, including account setup, contact management, email campaign creation, signup form design, automation, and campaign reporting.
What Is Brevo CRM?
Brevo is a customer engagement platform that helps businesses manage customer contacts and communicate through channels such as email. Depending on the account and available features, it can also support SMS, WhatsApp campaigns, sales CRM, and marketing automation.
Brevo was formerly known as Sendinblue. Its tools are useful for businesses that want to organize customer information, build email lists, send newsletters, promote offers, and automate routine communications.
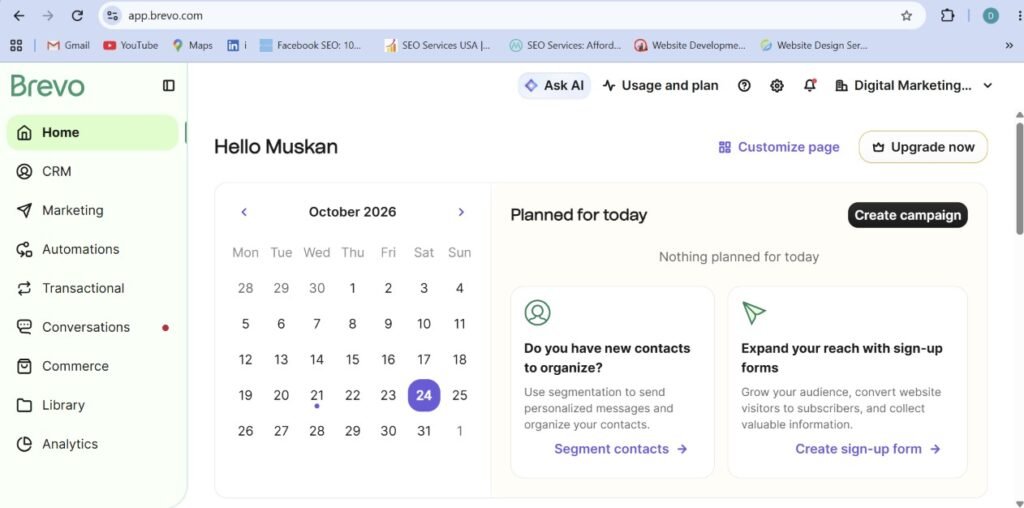
Key Features of Brevo
- Contact management: Store and organize customer information
- Email campaigns: Send newsletters, promotional emails, announcements, and updates
- Signup forms: Collect email addresses from website visitors
- Email automation: Send emails automatically when specific events or conditions occur
- Segmentation: Divide contacts into groups according to their interests or characteristics
- Email templates: Design professional emails without needing advanced coding skills
- Campaign reports: Measure opens, clicks, bounces, unsubscribes, and other available metrics.
These features make Brevo useful for small businesses, startups, marketing agencies, educational institutes, and growing brands.
Step 1: Create Your Brevo Account
Before creating an email marketing campaign, you need a Brevo account.
Follow these steps:
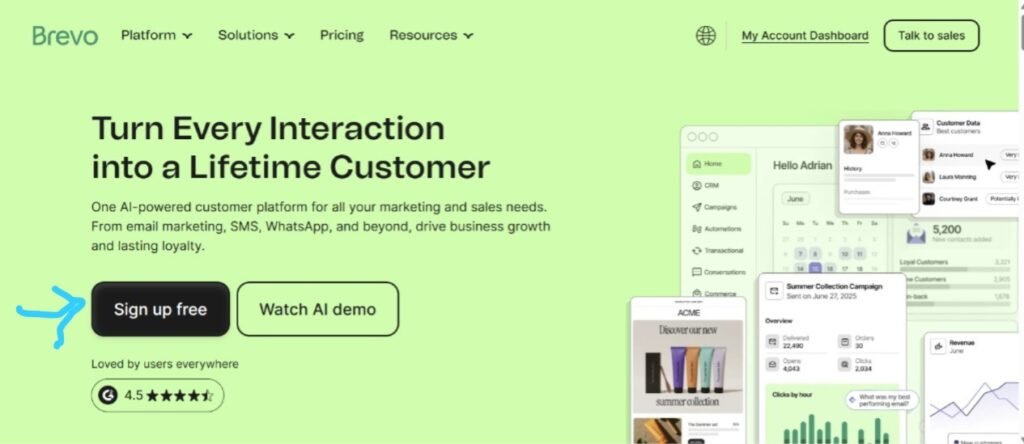
- Visit the official website: Brevo.
- Click the signup or registration option.
- Enter your business email address and the other requested details.
- Complete email verification if prompted.
- Follow the onboarding instructions to configure your account.
- Enter your business information, including your company name and website, where requested.
- Explore the dashboard to understand the available marketing and CRM features.
Once your account is ready, you can begin organizing contacts and preparing your first campaign.
Practical tip: Use a professional business email address and accurate business information. Before sending campaigns, complete the sender verification and domain authentication steps Brevo requires or recommends for your account.
Step 2: Set Up Your Sender Information
Your sender information tells recipients who is sending the email. Clear and recognizable sender details can help establish trust.
To configure your sender:
- Open your Brevo account.
- Navigate to the sender or email settings area.
- Add the name you want recipients to see.
- Enter the email address you will use to send campaigns.
- Complete any verification steps requested by Brevo.
For example, an institute might use:
- Sender name: Digital Marketing Nurture
- Sender email: A verified business email address associated with your domain
The exact sender settings may appear in different locations depending on the current dashboard.
Authenticate Your Domain
Email authentication helps receiving email services verify that your messages are authorized to come from your domain.
Follow Brevo’s instructions to configure the required DNS records, which may include DKIM and DMARC and, depending on your setup, other records.
If your domain is managed through a hosting provider, you may need to add these records in its DNS settings.
Proper authentication, relevant content, permission-based contact lists, and good sending practices can improve deliverability. Authentication alone, however, does not guarantee that every email will reach the inbox.
Step 3: Add and Organize Contacts in Brevo
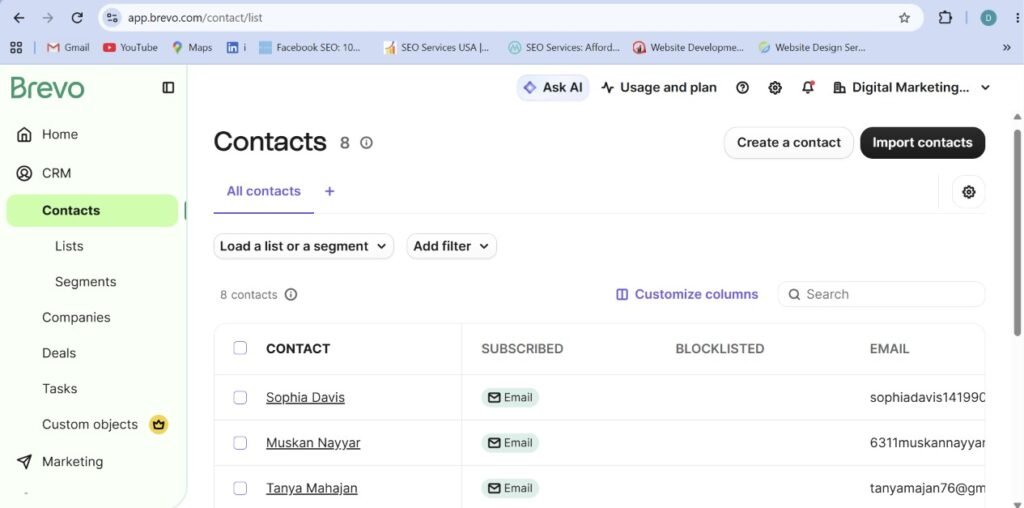
An email campaign needs a recipient list. Brevo allows you to manage contacts individually or import them in bulk.
Option A: Add Contacts Manually
Follow these steps:
- Open the CRM or Contacts section.
- Select the option to create or add a contact.
- Enter the contact’s email address.
- Add available information, such as first name, last name, company, or other relevant attributes.
- Assign the contact to the appropriate list, where the interface allows it.
- Save the contact.
This method is suitable when you have only a few contacts to add.
Option B: Import Contacts Using a CSV File
If you already have a contact database, importing a CSV file can save time.
- Prepare your spreadsheet in Excel or Google Sheets.
- Add clear column headings, such as Email, First Name, Last Name, and Company.
- Check that email addresses are valid and remove duplicate records.
- Export or download the spreadsheet as a CSV file.
- In Brevo, open the Contacts section and select the import option.
- Upload the CSV file.
- Match each spreadsheet column with the corresponding Brevo contact attribute.
- Select or create the destination list, if prompted.
- Review the import settings and complete the import.
- Check the resulting contact list for errors.
Important: Import only contacts you are permitted to email for the intended purpose. Do not purchase email lists or assume that having someone’s email address means they have consented to receive promotional messages.
How to Create Contact Lists
Lists help you organize contacts according to the type of communication they should receive.
For example, Digital Marketing Nurture could create the following lists:
- Newsletter Subscribers
- Digital Marketing Course Enquiries
- Website Development Leads
- Workshop Registrations
- Existing Clients
To create a list, open the Contacts or Lists area, choose the option to create a new list, enter a descriptive name, and save it. The precise menu labels may vary.
Organizing contacts into relevant lists makes it easier to send targeted campaigns rather than sending every message to everyone.
Step 4: Create Your First Email Marketing Campaign in Brevo
An email campaign is a message or series of messages sent to a selected audience. Businesses use campaigns to share newsletters, announce new services, promote offers, invite people to events, and communicate important updates.
Brevo’s official campaign guide provides the current workflow: Create and send an email campaign.

Step 4.1: Start a New Campaign
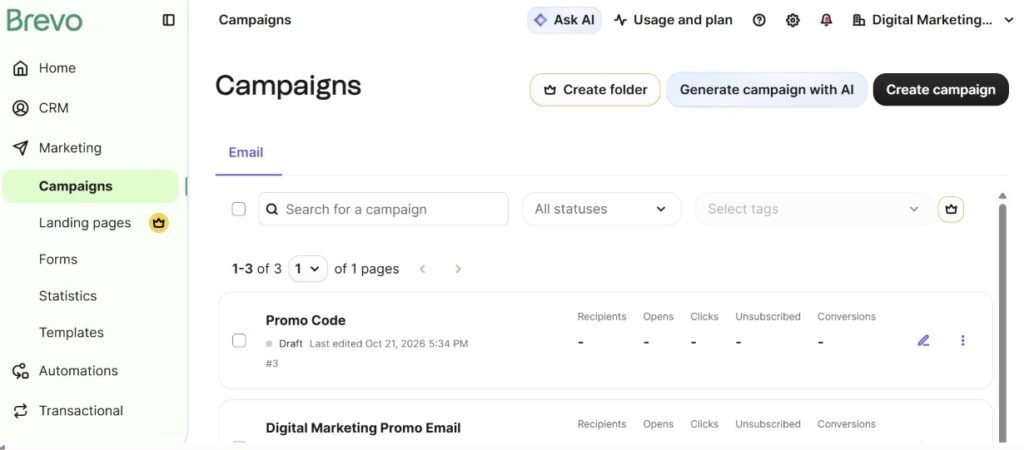
- Log in to your Brevo account.
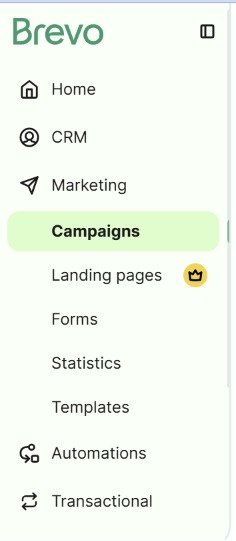
- Navigate to Marketing → Campaigns.
- Click Create campaign.
- Select Email.
- Choose a regular email campaign for a standard newsletter or promotional email.
- Enter an internal campaign name.
For example, you could name your campaign DMN October Digital Marketing Newsletter.
This name helps you identify the campaign in your dashboard and is not necessarily the subject line your subscribers will see.
Step 4.2: Select the Sender
Choose the verified sender name and email address you configured earlier.
For example:
Digital Marketing Nurture | Your verified business email
Using a consistent sender identity helps subscribers recognize your organization.
Step 4.3: Choose Your Recipients
Select the contact list or eligible audience segment that should receive the campaign.
For example, if you are promoting a digital marketing workshop, select the relevant workshop subscribers or leads who have permission to receive that communication.
Before proceeding, check the list carefully. Avoid sending irrelevant promotional emails to contacts who did not agree to receive them.
Step 4.4: Add the Email Subject Line and Preview Text
The subject line is one of the first things recipients see in their inbox. The preview text provides additional context about the message.
Example:
Subject line: Learn Practical Digital Marketing Skills with DMN
Preview text: Explore SEO, social media marketing, email marketing, and more.
Another example for an existing subscriber newsletter:
Subject line: Your Monthly Digital Marketing Tips Are Here
Preview text: Discover useful tools, marketing strategies, and practical learning resources.
Keep the subject line clear, relevant, and honest. Avoid misleading claims and excessive promotional wording.
Step 4.5: Design the Email
Click Start designing or the equivalent design option in your campaign workflow.
Brevo provides an email editor that allows you to build an email using content blocks. Depending on the editor, you can add or arrange elements such as:
- Headings and paragraphs
- Images and logos
- Buttons and call-to-actions
- Dividers and spacing
- Social media links
- Footer information
You can also use an existing template or a saved design when available.
For a professional marketing email, use your brand colors, readable fonts, clear headings, and a simple layout that works well on mobile devices
Step 4.6: Write the Email Content
Your email should communicate one main message and guide the reader toward a relevant action.
A basic structure includes:
- A greeting or introductory heading
- A short explanation of the announcement or offer
- The main benefits or useful information
- A clear call-to-action button
- Your business contact details and required unsubscribe information
For example, an email from Digital Marketing Nurture might introduce an upcoming practical workshop, explain what participants will learn, and include a button linking to the registration page.
Avoid placing too much information in a single email. A focused message is usually easier to read and understand.
Step 4.7: Add a Call to Action
A call to action (CTA) tells the reader what to do next.
Examples include:
- Register for workshops
- Explore our courses
- Read the latest blog
- Contact our team
- View our services
In the email editor, add a button or link and connect it to the correct destination page.
Always test the destination link before sending the campaign.
Step 4.8: Preview and Test the Email
Before sending a campaign to your entire list, review it carefully.
- Open the email preview.
- Check the desktop and mobile layouts, where available.
- Review the subject line and preview text.
- Check the spelling, grammar, images, and links.
- Confirm that the sender information is correct.
- Send a test email to yourself or your team.
- Open the test email on a mobile device if possible.
- Check that the footer and unsubscribe link are present.
This step helps you identify formatting problems and incorrect links before your subscribers receive the message
Step 4.9: Schedule or Send the Campaign
Once your campaign is ready, choose the available send or scheduling option.
You may be able to:
- Send the campaign immediately.
- Schedule it for a future date and time.
- Use an available optimized sending-time feature, depending on your account and campaign setup.
Choose the appropriate option, review the final campaign details, and confirm the action.
Your campaign will then be sent or scheduled according to your selection.
Step 5: Create a Signup Form in Brevo
A signup form allows website visitors to voluntarily subscribe to your newsletter or another type of email communication.
For example, Digital Marketing Nurture could add a newsletter subscription form to its website so visitors can receive digital marketing tips, SEO updates, and information about upcoming workshops.
Brevo’s official instructions are available here: Create a sign-up form in Brevo.
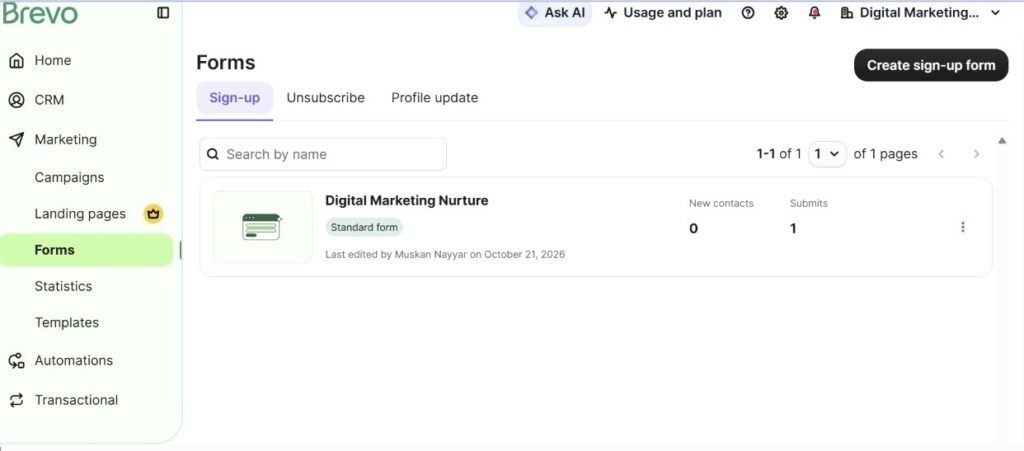
Step 5.1: Open the Forms Section
- Log in to Brevo.
- Navigate to Marketing → Forms.
- Open the Sign-up tab.
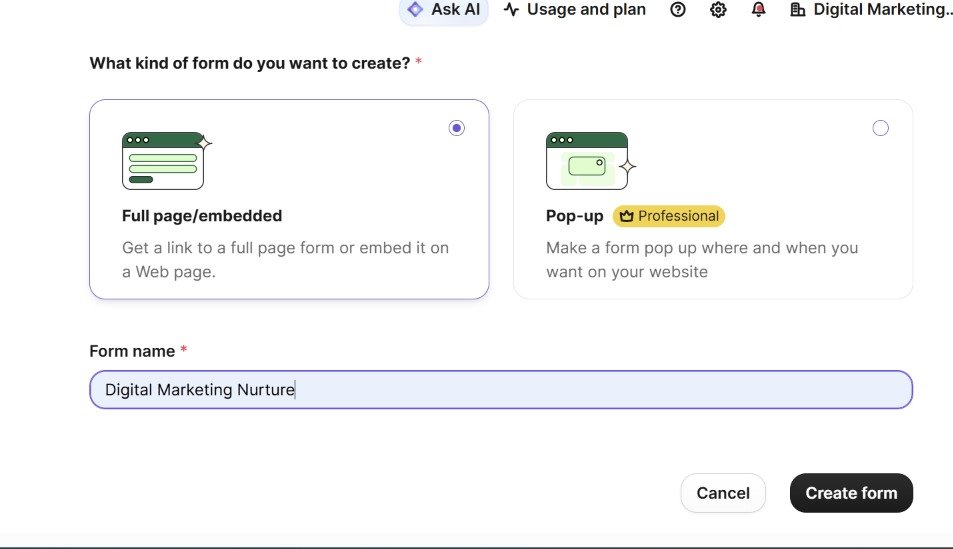
- Click Create sign-up form.
- Select the full-page or embedded form option, as appropriate.
- Enter an internal name for your form.
- Continue to the form editor.
The exact interface may vary as Brevo updates its platform.
Step 5.2: Design the Signup Form
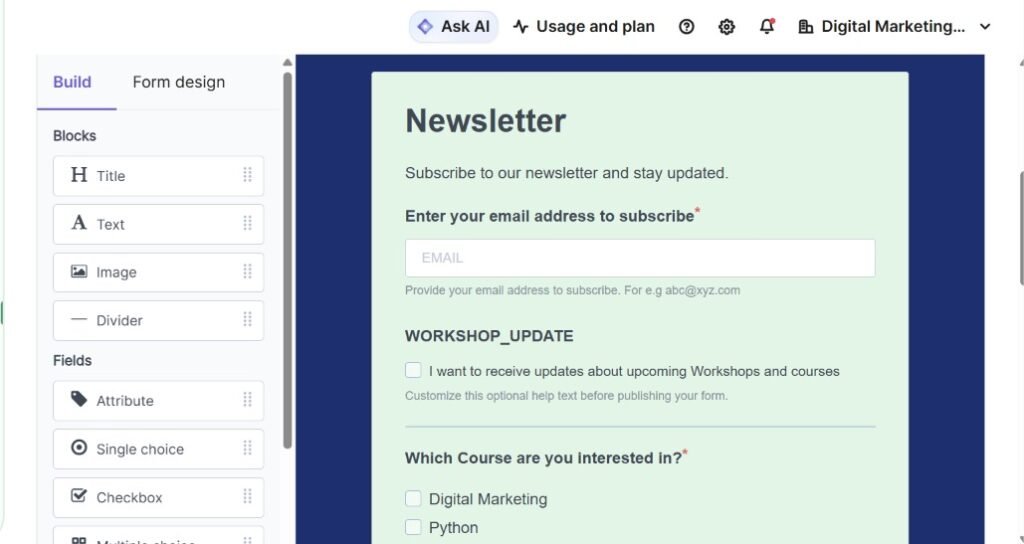
Use the form builder to add the fields and content your visitors need.
A simple newsletter form might contain:
- First Name
- Email Address
- Consent checkbox and privacy information, as appropriate
You can also add a heading, introductory text, brand logo, and subscription button.
Example heading:
Stay Updated with Digital Marketing Nurture
Example description:
Subscribe to receive practical digital marketing tips, SEO strategies, useful AI tools, and updates on upcoming workshops.
Example button text:
Subscribe Now
Keep the form short and easy to complete. Asking for unnecessary information may discourage visitors from subscribing.
Step 5.3: Configure the Form Fields
Brevo forms use contact attributes to store the information submitted by subscribers.
If you need a field that does not already exist, create the relevant contact attribute in your account settings before adding it to the form.
For example, you might collect a subscriber’s first name and email address. You could also add an interest field if you want to understand which topics they prefer.
Ensure that your form includes an appropriate contact method, such as an email address, and that the information collected is relevant to the purpose explained to visitors.
Step 5.4: Add Consent and Spam Protection
Where applicable, include clear consent language that explains what subscribers are signing up for and links to your privacy policy.
For example:
I agree to receive email updates from Digital Marketing Nurture. I understand that I can unsubscribe at any time.
Adapt this wording to your actual practices and applicable legal requirements. Do not treat a preselected checkbox or an unrelated transaction as automatic permission for promotional emails.
Brevo supports form confirmation options and CAPTCHA features. These can help verify subscriptions and reduce automated or fake submissions.
Step 5.5: Choose the Contact List
Select the list into which new subscribers should be added.
For example:
Newsletter Subscribers
When a visitor submits the form, their contact information can be added to the selected list according to the form’s confirmation settings.
Choose the list carefully so that subscribers receive relevant communications.
Step 5.6: Configure Subscription Confirmation
Brevo offers different confirmation approaches, depending on the form and account setup.
Double opt-in: The subscriber receives a confirmation email and must click the confirmation link before completing the subscription process.
Simple confirmation: The subscriber receives a confirmation email, while their contact record is added according to the selected process.
No confirmation: The subscriber does not receive a separate subscription confirmation email.
Double opt-in is a useful approach for verifying that a person controls the email address submitted and for maintaining a clear record of subscription intent
Step 5.7: Customize Success and Error Messages
Configure the messages shown when someone submits the form.
For example:
Success message: Thank you for subscribing! Look out for useful digital marketing updates from us.
Error message: Something went wrong. Please check your details and try again.
Clear messages help visitors understand whether their submission was successful.
Step 5.8: Publish and Share the Form
Once you finish designing and configuring the form:
- Review the form.
- Save it using the final step in the builder.
- Copy its shareable URL or embed code.
- Add the form to a suitable page on your website, where supported.
- Alternatively, share its link through your social media channels.
- Test the form by submitting a test address and checking the resulting contact record.
If you embed the form on a website, check that it displays correctly on desktop and mobile devices.
Step 5.9: Check New Subscribers
Open the relevant contact list to verify that submissions are being recorded correctly.
If a double opt-in process is enabled, remember that a person may need to click the confirmation link before being added as a confirmed subscriber.
For more information, refer to Brevo’s official signup form documentation
Step 6: Create an Automated Welcome Email
Email automation allows businesses to send messages automatically when a specified event or condition occurs.
For example, when a visitor subscribes to the Digital Marketing Nurture newsletter, an automated workflow can send a welcome email without requiring someone to send it manually each time.
How to Set Up a Welcome Email
- Open the Automations section in Brevo.
- Create a new automation workflow.
- Select a trigger such as a signup form submission, if supported by the selected workflow.
- Choose the relevant form or other qualifying condition.
- Add an action to send an email.
- Select or create a suitable email template.
- Write a welcome message.
- Review the workflow and test it.
- Activate the workflow when it is ready.
The available triggers and actions depend on your Brevo account and current automation tools. Consult the official Brevo automation guide for details.
Example Welcome Email
Subject: Welcome to Digital Marketing Nurture!
Email body:
Hello,
Thank you for subscribing to Digital Marketing Nurture.
We share practical resources, useful digital marketing insights, SEO tips, AI tools, and updates designed to help you build your digital skills.
Keep an eye on your inbox for upcoming updates.
Best regards,
Digital Marketing Nurture
You can also create a more advanced workflow with multiple messages, provided the relevant automation features are available in your account.
For example, the sequence could include a welcome email immediately after subscription, an educational email a few days later, and a relevant workshop announcement after that. Set timing and conditions carefully so subscribers do not receive unnecessary or repetitive emails.
Step 7: Use Segmentation to Send Targeted Emails
Segmentation means dividing your contacts into smaller groups based on their attributes, interests, or activity.
Instead of sending the same email to everyone, you can create campaigns that better match the needs of each audience.
For example, Digital Marketing Nurture could organize eligible contacts into groups such as:
- People interested in SEO
- Subscribers interested in AI tools
- Workshop participants
- Business owners interested in digital marketing services
- Existing clients interested in website development
To create a segment, open the relevant contacts or segmentation area, choose the available filters, and define the conditions for the group. Save the segment if your account supports that option.
When creating a campaign, select the relevant segment as the recipient audience.
Use accurate contact information and relevant filters. Segmentation should make your emails more useful, not lead to excessive or intrusive messaging.
Step 8: Track Email Campaign Performance
Sending an email is only one part of email marketing. You also need to evaluate how people respond.
After your campaign has been sent and sufficient time has passed, open the campaign reporting area in Brevo.
Depending on the report and tracking configuration, you may see metrics such as:
- Email Opens
The open rate estimates how many recipients opened the email, based on available tracking data.
However, privacy features and image-loading behavior can affect open tracking. Therefore, open rate should not be treated as a perfectly accurate measure of engagement.
- Clicks
Click metrics show whether recipients clicked tracked links in the email.
Clicks can help you understand whether your content and calls to action encouraged people to take the next step.
- Bounce Rate
A bounce occurs when an email cannot be delivered to the intended address.
Hard bounces usually indicate permanent delivery problems, while soft bounces may be temporary. Regularly reviewing bounces helps you maintain a healthier contact database.
- Unsubscribes
This metric shows how many recipients opted out of future marketing emails.
A high unsubscribe rate may indicate that the campaign was irrelevant, too frequent, or different from what subscribers expected.
- Conversions
A conversion is the action you want someone to complete, such as registering for a workshop, submitting an enquiry, or making a purchase.
Conversion measurement may require website analytics, campaign tracking parameters, or additional integrations. Email clicks alone do not prove that a conversion occurred.
How to Improve Future Campaigns
Use campaign reports to identify patterns and test improvements.
- Test different subject lines
- Make the Email easier to read on mobile devices
- Use clear calls to action
- Send relevant messages to audience segments
- Remove invalid addresses and review bounced emails
- Maintain a consistent but reasonable sending schedule.
- Use website analytics to measure meaningful business outcomes.
For a more detailed understanding, see Brevo’s email campaign reporting and analytics resources.
Step 9: Follow Email Marketing Best Practices
A successful email marketing strategy requires more than knowing how to operate the platform. Your content, audience selection, sending practices, and measurement all matter.
Follow these best practices:
- Build a permission-based email list. Collect addresses through appropriate signup forms and other legitimate methods. Avoid purchased lists.
- Send relevant content. Make sure your emails match subscribers’ interests and expectations.
- Write clear subject lines. Tell readers what the message is about without misleading them.
- Keep your design simple. Use readable fonts, clear headings, accessible colors, and mobile-friendly layouts.
- Include a clear call to action. Help readers understand what they should do next.
- Authenticate your sending domain. Follow the relevant DNS and email authentication instructions provided by Brevo.
- Include an unsubscribe option. Give recipients an accessible way to stop receiving marketing emails and honor their preferences.
- Monitor campaign results. Review clicks, bounces, unsubscribes, and conversions instead of relying on a single metric.
- Protect subscriber information. Collect only necessary information, restrict access appropriately, and follow applicable privacy and data protection requirements.
- Test before sending. Check links, content, rendering, and recipient selection before launching each campaign.
Common Mistakes to Avoid When Using Brevo
Beginners sometimes make avoidable mistakes while setting up their first campaigns.
- Importing contacts without appropriate permission
- Forgetting to verify sender information.
- Ignoring domain authentication requirements.
- Sending the same promotional email to every contact.
- Using a subject line that does not match the email content.
- Forgetting to test links and buttons
- Creating long forms that ask for unnecessary information.
- Activating an automation without testing the trigger and email content.
- Ignoring bounced addresses and unsubscribe requests.
- Judging campaign success only by the number of emails sent.
Avoiding these mistakes can help you build a more reliable email marketing process.
Frequently Asked Questions (FAQs)
Brevo is used for customer communication and engagement, including email campaigns, contact management, signup forms, and marketing automation. Additional capabilities depend on the account and available features.
Yes. Beginners can start by organizing contacts, creating a simple email campaign, designing a signup form, and reviewing campaign reports. More advanced automation can be introduced as their requirements grow.
Navigate to Marketing → Campaigns, choose the option to create an email campaign, configure the sender and recipients, add the subject and preview text, design the email, test it, and then send or schedule it.
Navigate to Marketing → Forms, select the signup form creation option, design the form, configure the fields and subscription confirmation settings, select the contact list, and save and share the form.
Yes. Brevo supports automation workflows that can send emails when configured triggers occur. The exact setup depends on the available automation features and the event you want to use.
Brevo can be useful for small businesses that need to organize contacts, communicate with subscribers, and manage email campaigns. The suitability of a particular plan depends on the business's contact volume, sending requirements, and required features.
Focus on permission-based lists, relevant content, clear subject lines, mobile-friendly designs, effective calls to action, accurate audience segmentation, and regular performance analysis.
Conclusion
Brevo provides businesses with practical tools for managing contacts, creating email campaigns, collecting subscribers, and automating customer communications. By following the steps in this guide, beginners can build a structured email marketing process, from account setup and signup forms to campaign delivery and performance analysis.
The key to effective email marketing is not simply sending more emails. It is delivering relevant information to the right audience, respecting subscriber preferences, and continuously improving campaigns using reliable data.
At Digital Marketing Nurture, learning how to use tools such as Brevo can help students and marketing professionals develop practical digital marketing skills that can be applied to real business projects.
Whether you are a beginner, student, entrepreneur, or business owner, start with one well-planned campaign, measure the results, and improve your strategy over time.